1. Add rooms with addresses and instructors
In the Studio app
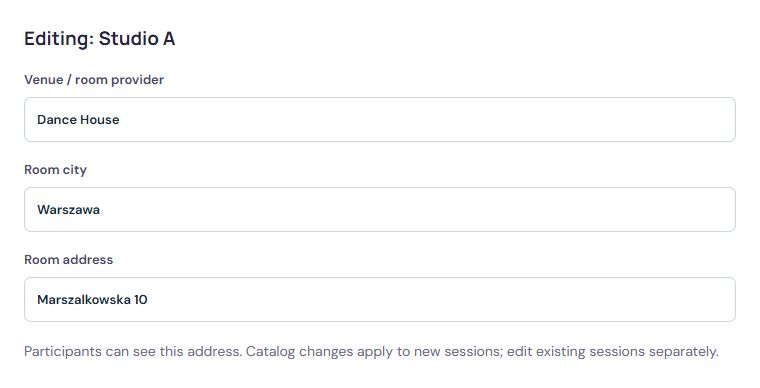
Find on screen:Room addressAdd rooms with addresses and instructors
Actual Studio interface. Sample data.
Open full-size screenshotCreate one profile under your name or brand. In the schedule and offering area, add yourself as an instructor, a class type and each room with its venue name, city and address. Mark rooms rented from other businesses as external.
Each class has its own room and address. All published classes share the organiser’s schedule. Studio checks conflicts within that profile; you arrange availability with the room owner and allow for travel time yourself.
2. Plan classes and check for conflicts
In the Studio app
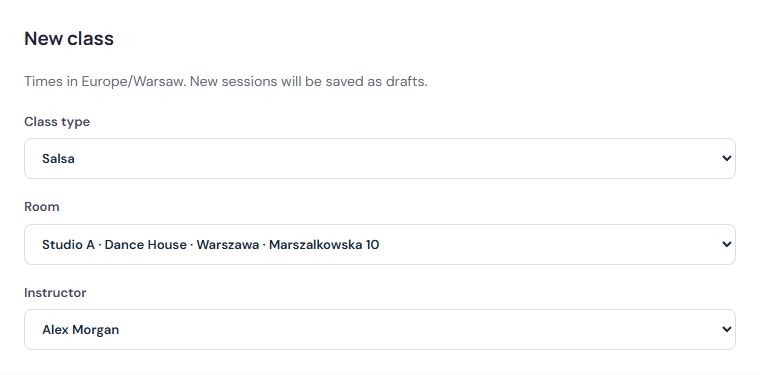
Find on screen:Class typePlan classes and check for conflicts
Actual Studio interface. Sample data.
Open full-size screenshotAdd rooms and instructors, then prepare your class offering. For each session, set the time, location, instructor, group limit and price. Key information stays attached to the relevant class.
Conflict checks help avoid clashes when assigning rooms and instructors. If saving a change is rejected, correct the highlighted information and check the session again.
Allow time for groups to change and the room to be prepared. For example, after a class ending at 18:00, schedule the next one at 18:15. This is the school’s decision; include the break in your session times.
3. Publish the week and check the participant view
In the Studio app
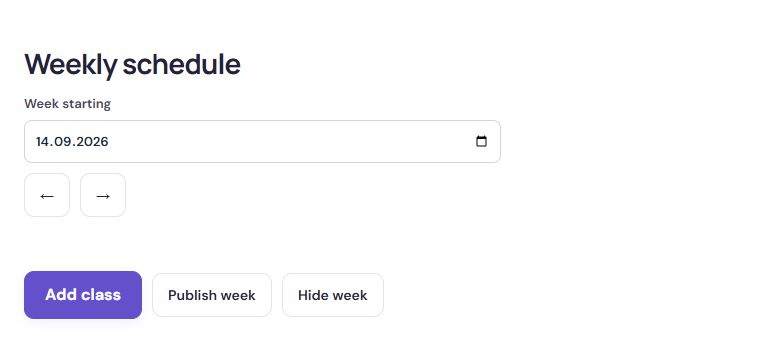
Find on screen:Publish weekPublish the week and check the participant view
Actual Studio interface. Sample data.
Open full-size screenshotIn “Profile and booking”, publish the profile and enable class bookings. In the schedule, publish the week or the whole series. Copy the booking link above the schedule to share all classes, or the link next to a specific class. Participants do not need access to the organiser panel.
The public schedule shows published classes by week. Customers can filter by type and instructor, view details and proceed to booking when available.
- Check the time, room and instructor before publishing.
- Add the class level to help people choose a group.
- After changes, check the participant-facing page too.
4. Update the venue of scheduled classes
In the Studio app
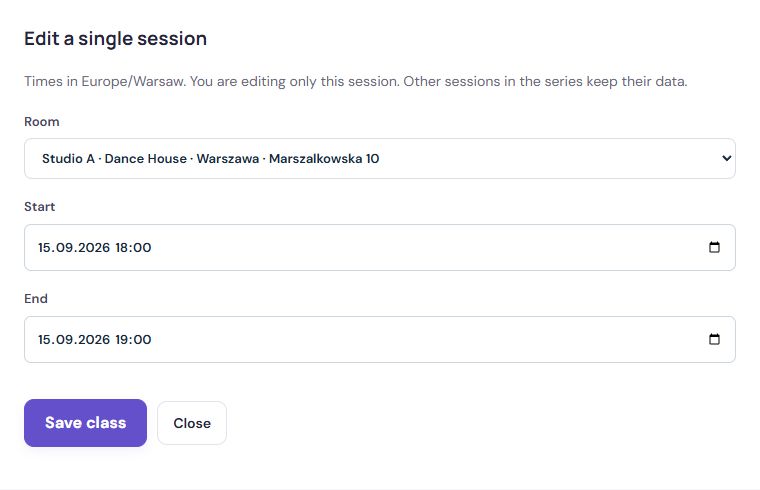
Find on screen:RoomUpdate the venue of scheduled classes
Actual Studio interface. Sample data.
Open full-size screenshotChanging a room address in the catalogue does not update existing classes. To move a scheduled class, edit the class and review the impact on participants. After saving, check the public schedule and tell participants about the move.
Frequently asked questions
Does Studio prevent room and instructor clashes?
Yes. Conflict checks help avoid assigning the same room or instructor to overlapping sessions. If saving a change is rejected, correct the highlighted information and check the session again.
Can I schedule a regular class for several weeks at once?
Yes. When planning, you can create the session for the following weeks straight away and skip selected dates, such as holidays. Check the time, room and instructor before publishing.
When will participants see new sessions?
Only once they are published. The public schedule shows published classes by week, and participants can filter them by class type and instructor.